Task 3: Setting Up GitHub Actions
In this task, we’ll create GitHub Actions to automatically build and publish our API and Web application Docker images to GitHub Container Registry (GCR) whenever we push changes to our repository.
Step 1: GitHub Container Registry (GCR)
GitHub Container Registry (GCR) is a container registry that allows you to store and manage Docker images within GitHub. It integrates seamlessly with GitHub Actions, making it easy to build, publish, and share container images.
The advantage of using a container registry like GCR is that it provides a centralized location to store your Docker images, making it easier to manage and share them across different environments.
Before proceeding, ensure you have a GitHub repository set up for your project. Moreover, create a .github/workflows directory in your repository root if it doesn’t already exist.
Step 2: Create GitHub Actions Workflow Files
We’ll create two workflow files, one for the API and one for the Web application.
API Workflow
In the .github/workflows directory, create a file named api.container.yml and add the following content to it:
name: Build and push the API container image
on:
push:
branches:
- main
paths:
- 'api/**'
- '.github/workflows/api.container.yml'
workflow_dispatch:
permissions:
contents: read
packages: write
attestations: write
id-token: write
concurrency:
group: "API Container"
cancel-in-progress: true
jobs:
build:
runs-on: ubuntu-latest
steps:
- name: Checkout
uses: actions/checkout@v4.1.6
with:
sparse-checkout: "api"
sparse-checkout-cone-mode: false
- name: Move files in the "api" folder to the root
run: |
ls -lah
shopt -s dotglob
mv api/* .
rm -rf api
ls -lah
- name: Login to GitHub Container Registry
uses: docker/login-action@v3
with:
registry: ghcr.io
username: ${{ github.actor }}
password: ${{ secrets.GITHUB_TOKEN }}
- name: Build the docker image
run: |
docker build . --tag ghcr.io/${{ github.repository }}-api:latest
docker push ghcr.io/${{ github.repository }}-api:latestThis workflow file specifies the following:
- The workflow triggers on pushes to the
mainbranch that include changes to theapidirectory or the workflow file itself. - The workflow runs on the latest version of the Ubuntu runner.
- The steps include checking out the repository, moving the contents of the
apidirectory to the root, logging in to GitHub Container Registry, building the Docker image, and pushing it to the registry.
Web Application Workflow
In the .github/workflows directory, create a file named web.container.yml and add the following content to it:
name: Build and push the Web container image
on:
push:
branches:
- main
paths:
- 'web/**'
- '.github/workflows/web.container.yml'
workflow_dispatch:
permissions:
contents: read
packages: write
attestations: write
id-token: write
concurrency:
group: "Web Container"
cancel-in-progress: true
jobs:
build:
runs-on: ubuntu-latest
steps:
- name: Checkout
uses: actions/checkout@v4.1.6
with:
sparse-checkout: "web"
sparse-checkout-cone-mode: false
- name: Move files in the "web" folder to the root
run: |
ls -lah
shopt -s dotglob
mv web/* .
rm -rf web
ls -lah
- name: Login to GitHub Container Registry
uses: docker/login-action@v3
with:
registry: ghcr.io
username: ${{ github.actor }}
password: ${{ secrets.GITHUB_TOKEN }}
- name: Build the docker image
run: |
docker build . --tag ghcr.io/${{ github.repository }}-web:latest
docker push ghcr.io/${{ github.repository }}-web:latestThe workflow file for the Web application is similar to the API workflow but tailored for the Web application directory.
Step 3: Push Changes and Trigger the Workflows
- Commit the new workflow files to your repository.
- Push these changes to your GitHub repository.
- Go to the “Actions” tab in your GitHub repository to see the workflows running.
Step 4: Verify the Published Images
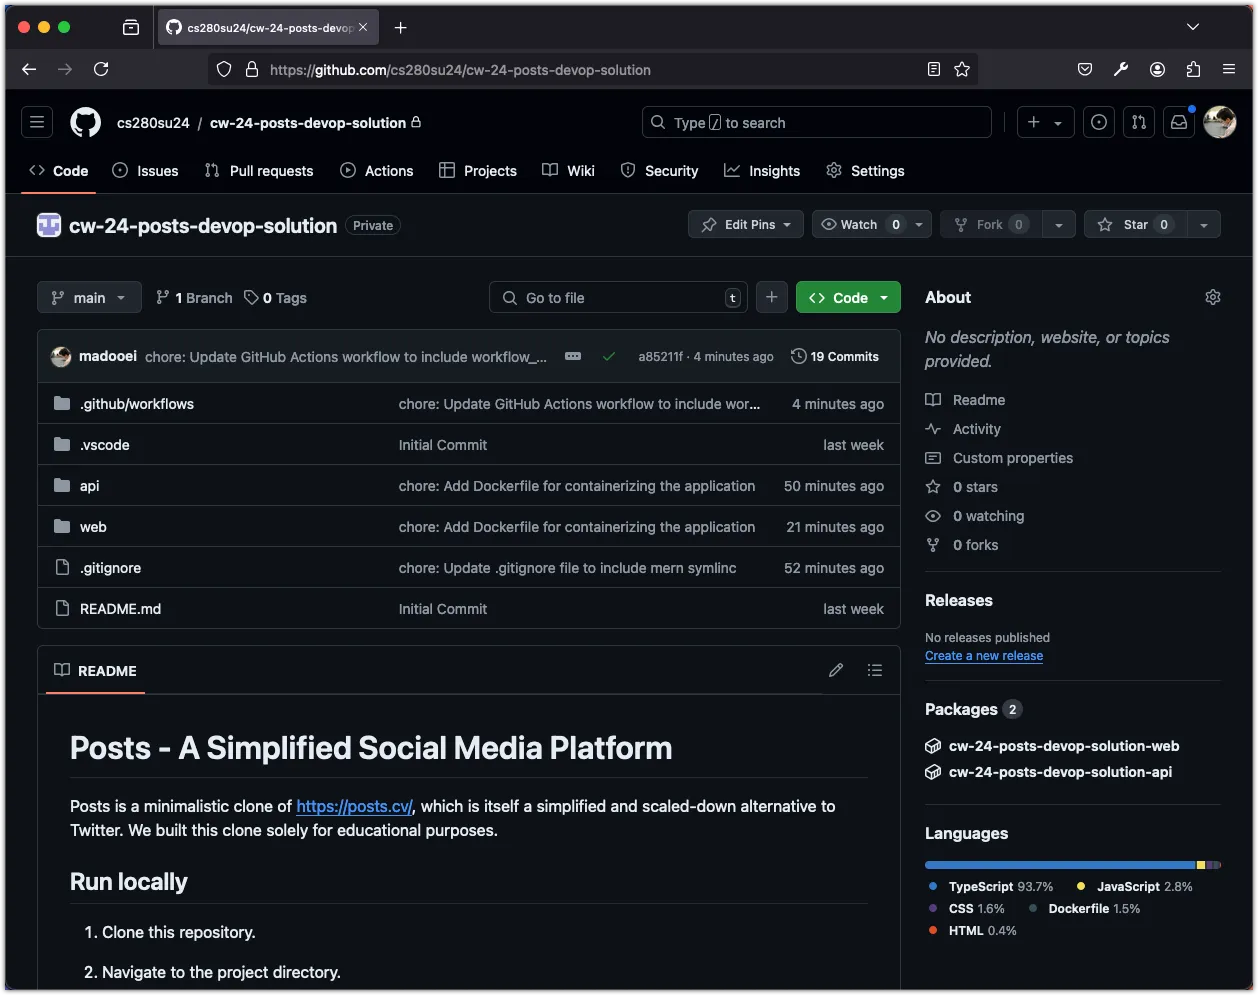
Once the workflows complete successfully, go to the Github repository page for your project.

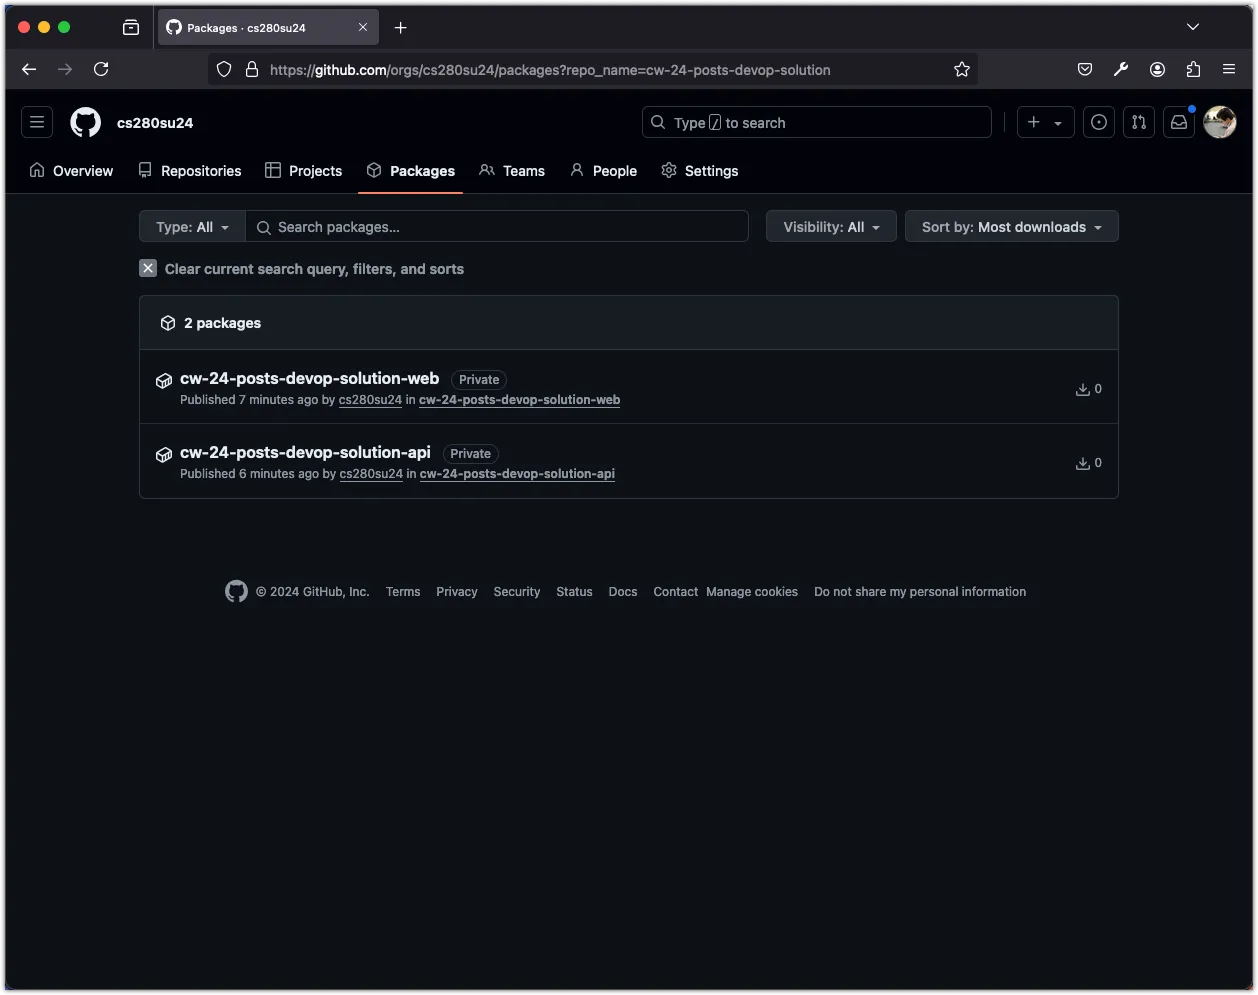
Navigate to the “Packages” section in the sidebar. You should see your newly published Docker images for both the API and Web application.

If your repository is private, these packages will be private as well. You can click on each package, open “package settings,” and change its visibility to public if needed. For the purpose of this tutorial, I recommend making them public.
Step 5: Pull the Images Locally
To verify that the images are working as expected, you can pull them locally and run them using Docker. Here’s how you can do it:
-
Go to project’s GitHub repository page.
-
Click on the “Packages” in the sidebar.
-
Click on the API package to open its details page.
-
At the top of the page, you’ll see the command to pull the image. Copy this command. For example, my command looks like this:
docker pull ghcr.io/cs280su24/cw-24-posts-devop-solution-api:latest -
Open a terminal and run the command to pull the image.
-
Once the image is pulled, you can run it using the
docker runcommand:docker run -p 3000:3000 ghcr.io/cs280su24/cw-24-posts-devop-solution-api:latest -
You should see the API running locally at
http://localhost:3000. Try it using Postman. -
Repeat the same steps for the Web application image.
You can now share these images with your team or deploy them to other environments. The only requirements are Docker and access to the GitHub Container Registry.
Conclusion
You’ve now set up GitHub Actions workflows that automatically build and publish your API and Web application Docker images to GitHub Container Registry. These workflows run independently when changes are pushed to their respective directories.
In the next task, we’ll create a Docker Compose configuration that uses these published images, allowing for easy deployment of your entire application.